
This post illustrate how to import released products using the data import export framework in Dynamics AX 2012. We are going to import some of the released products information, you can add or remove fields as needed.
To import the released products please follow the steps below :
1- Go to Data import export framework --> Setup --> Data import / export framework Parameters.

2- Click browse to select shared working directory then click Validate button then close the form.

3- Go to Data import export framework --> Setup --> Source Data format, Create new source name and make sure to chose File in the Type field then select the file format in my example i will use excel.

4- Go to Data import export framework --> Common --> Processing Group, Create New Group then Click the Entities Button.

5- in the entities form select the Product Entity, Excel in the Source data format, then Click the generate source file button.

6- In the wizard make sure to select the following fields:
- DisplayProductNumber (Product Number)
- EcoResProductTranslation_LanguageId (Language)
- EcoResProductTranslation_Name ( Product Name)
- ItemId (Item Number)
- ProductType (Prodect Type)
- ProductSubType (Product Subtype)
- ItemGroupId (Item Group)
- ModelGroupId (Item Model Group)
- InventTableModuleSales_UnitId (Sales Unit)
- InventTableModuleInvent_UnitId (Inventory Unit)
- EcoResTrackingDimensionGroup_Name (Tracking Dimension Group)
- EcoResStorageDimensionGroup_Name (Storage Dimension Group)

7-Save the file in the shared folder you specified in step 2.

08-Open the Excel File, fill the data then save.

09-Go back to the processing group --> entities---> Select the Sample file path then click the generate source mapping button.

10- Click the Preview source file button to preview the data then close the form.

11- In the processing group select the group name then click the Get staging data button to copy the file data to staging table.

12-Click OK to create job.

13-Click Run in the staging data execution form.

14-Click OK.

15-The records will be inserted in the staging.

15-The records will be inserted in the staging.

16-In the processing group select the group name then click Copy Data to target button.

17-Select the Job ID that we created in step 12 then click OK.

18- Click Run to import data.
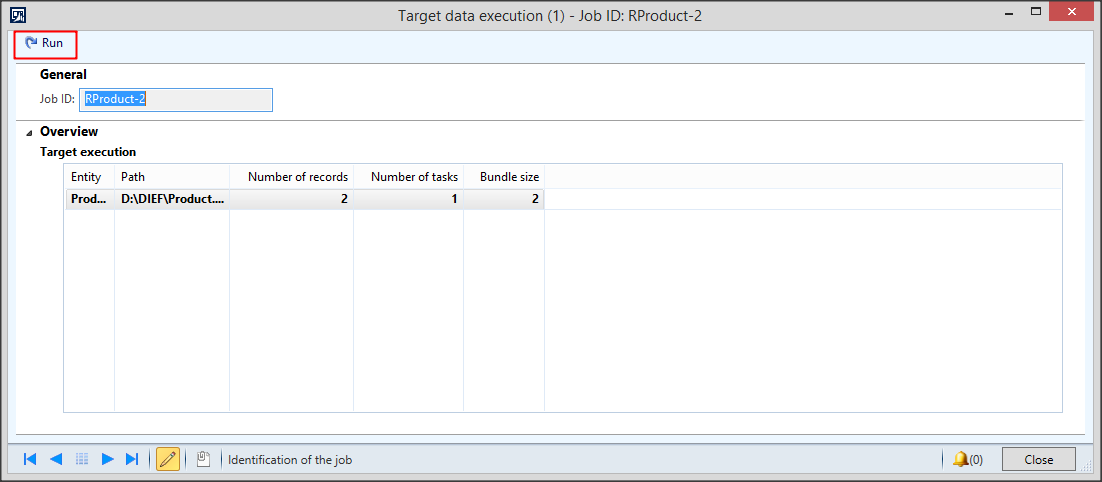
19-Click OK.

20-The data will be written to target.

21-To view the imported products go to the released products list form, you will found that the products was imported successfully.

The next post will illustrate how to import purchase orders :)
See Also
See Also


No comments:
Post a Comment