Purpose: The purpose of this article is to illustrate how to use Data import/export framework(DIXF) to export specific data to DAT File.
In part I of this series we discussed how to export all customers records without applying any kind of filters. today we are going to discuss how we can add filters to export specific customers by using one of the Data Import/Export Framework (DIXF) functionality,
Scenario: Exporting all customers records that have customer group 80.
Note : This article discuss specific functionality in DIXF (Applying Filters) so we are not going to explain the exporting process from A to Z. for more information about exporting data to DAT file step by step please see DIMF Part I:Export Customers to DAT File | Dynamics AX 2012 .
Prerequisites: Create new "Group Processing" as we discussed in part 1 Don't use the same one that we created previously to export All customers.
please do the following steps:
 To get new posts and updates, please follow the blog by clicking the Join this site Button in the top-right side under my personal information
See Also
In part I of this series we discussed how to export all customers records without applying any kind of filters. today we are going to discuss how we can add filters to export specific customers by using one of the Data Import/Export Framework (DIXF) functionality,
Scenario: Exporting all customers records that have customer group 80.
Note : This article discuss specific functionality in DIXF (Applying Filters) so we are not going to explain the exporting process from A to Z. for more information about exporting data to DAT file step by step please see DIMF Part I:Export Customers to DAT File | Dynamics AX 2012 .
Prerequisites: Create new "Group Processing" as we discussed in part 1 Don't use the same one that we created previously to export All customers.
please do the following steps:
- Go to Data Import Export framework --> Processing Group

- Select the new "Group processing" that you just created, --> then Click "Entities" Button.

- Select Customers entities --> then click "Select" Button(Here the trick).

- select customer group in the field column --> then write 80 in the Criteria.-->Click Ok.

- Close the Entity Group form

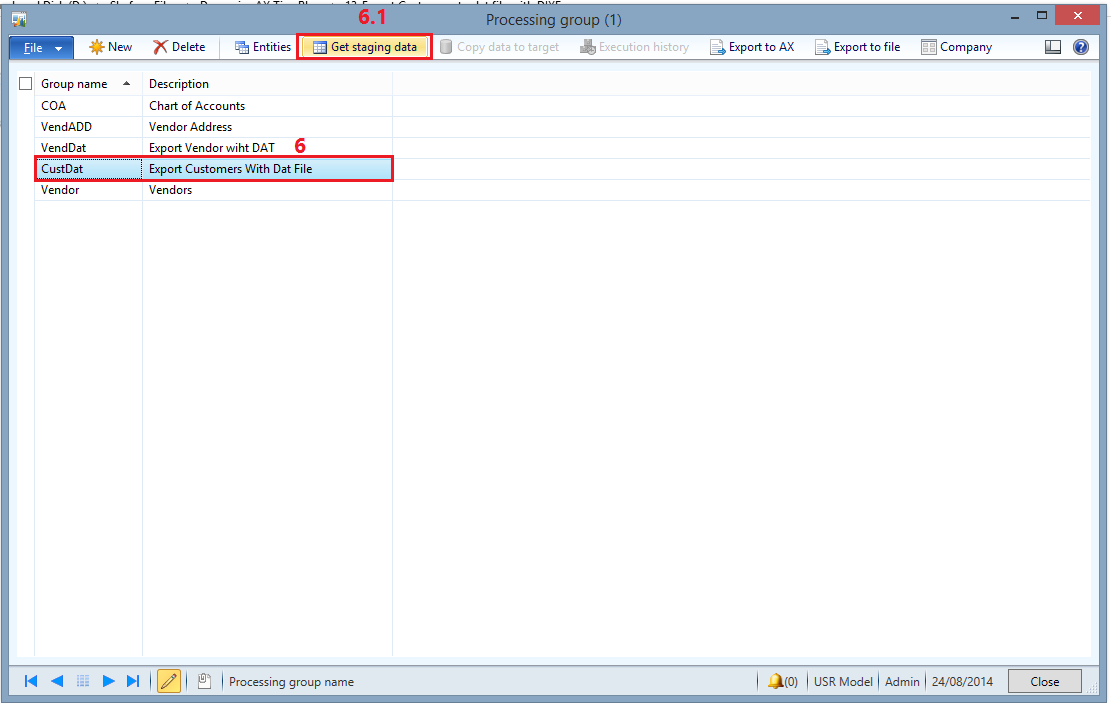
- Select the Processing Group ----> then Click the "Get Staging data" button to export the customer data from the original table to temporary table.
- Write proper description for the staging data job --> Then click "OK" button

- Click "Run" button in the "Staging data execution" form

- Click "OK" Button

- The message inform you about the the record number that have been inserted in the staging Table --> then Click "Close" Button

- Select "CustDAT" form the Processing Group ----> then Click the "Export To AX" button to export the customer data from the Staging table to the DAT file.

- write the file name with full path (Always use folder ) ----> then Click "OK" Button

- Go to path where the exported file located. open the .DAT File using MS Excel, note that customers with customer group No. 80 was only exported.
To get new posts and updates, please follow the blog by clicking the Join this site Button in the top-right side under my personal informationSee Also
No comments:
Post a Comment